Showing posts with label Tombow Mono Multi Glue. Show all posts

Thursday, November 21, 2019

You're Fintastic! Mermaid card for my daughter

My daughter, who is a freshman, recently had the opportunity to participate in her first overnight trip for the High School Swim Team! I was so excited and nervous for her because I had never missed a swim meet up until then. I wasn't able to travel to Moab, Ut for this particular swim meet and I wanted my daughter to know how much I was thinking about her and wanted to give her lots of love and encouragement, so I put together a little bag full of her favorite swim meet snacks and this super cute card.


I have always called my daughter My Little Mermaid and felt that it was fitting to make her a mermaid card. 
Not too long ago I started trying to create scenes on my cards and now I have fallen in love with that style. I had soooo much fun creating this underwater scene of encouragement! 

I used Neenah 80lb solar white cardstock and blended together Distress Oxide Inks of Cracked Pistachio, Broken China and Mermaid Lagoon with my Picket Fence Lifechanging Blending brushes. I splattered some water on the ink and blotted it off to give it a cool water effect.


I used my MISTI with some Versafine Onyx Black ink to stamp the mermaid and all of the sea life and other sea creatures. I mainly used the Beautiful Mermaids stamp set from Simon Says Stamp but some of the fish and also the sentiment are from Lawn Fawn's Fintastic Friends stamp set. 
I colored in all of my images using Prismacolor pencils. I used the coordinating dies from the mermaid set and my Cuttlebug to cut out those images and had to fussy cut the Lawn Fawn images because I don't have the dies for those. 


I adhered the images onto the water background using Tombow Mono Multi Glue and used Scotch foam tape to pop up the Mermaid. 
Some clear Wink of Stella was used on the Mermaid tail, seashells, and headband, then I added some Pretty Pink Posh sequins for a little more sparkle and I think they also look like bubbles! 

Thank you for visiting with me today, happy crafting!  

Monday, November 5, 2018

Lots of Smiles for the SSS Monday Challenge

Hey guys! Today I have a card that I hope will bring a smile to your face. 
I loved making this card, and using all the fun bright rainbow colors for my background. I am submitting this card over on the Simon Says Stamp Monday Challenge Blog where we were challenged to make our own background! Here is what I came up with: 


I used an old retired stamp set from Stampin' Up for my smiley faces. It's amazing that even though things get discontinued and old they are still cute and fun to use in making our projects! I stamped the solid shape in various colors of Memento ink. The smile stamp was stamped on top of the solid shapes using Lawn Fawn jet black ink. 


I then started using my dies. I used Pink and Main's stitched round rectangles to cut out my background and then I cut out of black cardstock Lawn Fawn's Cole's uppercase ABC's. I cut out 3 of each letter and stacked them up for dimension. Once they were glued down I sparkled them up with a Wink of Stella glitter brush pen and then put a coat of Glossy Accents on top of that for a fun sparkly and shiny finish! 

And that is my card for today, thank you for visiting, and have a super fun and crafty day!

Monday, June 26, 2017

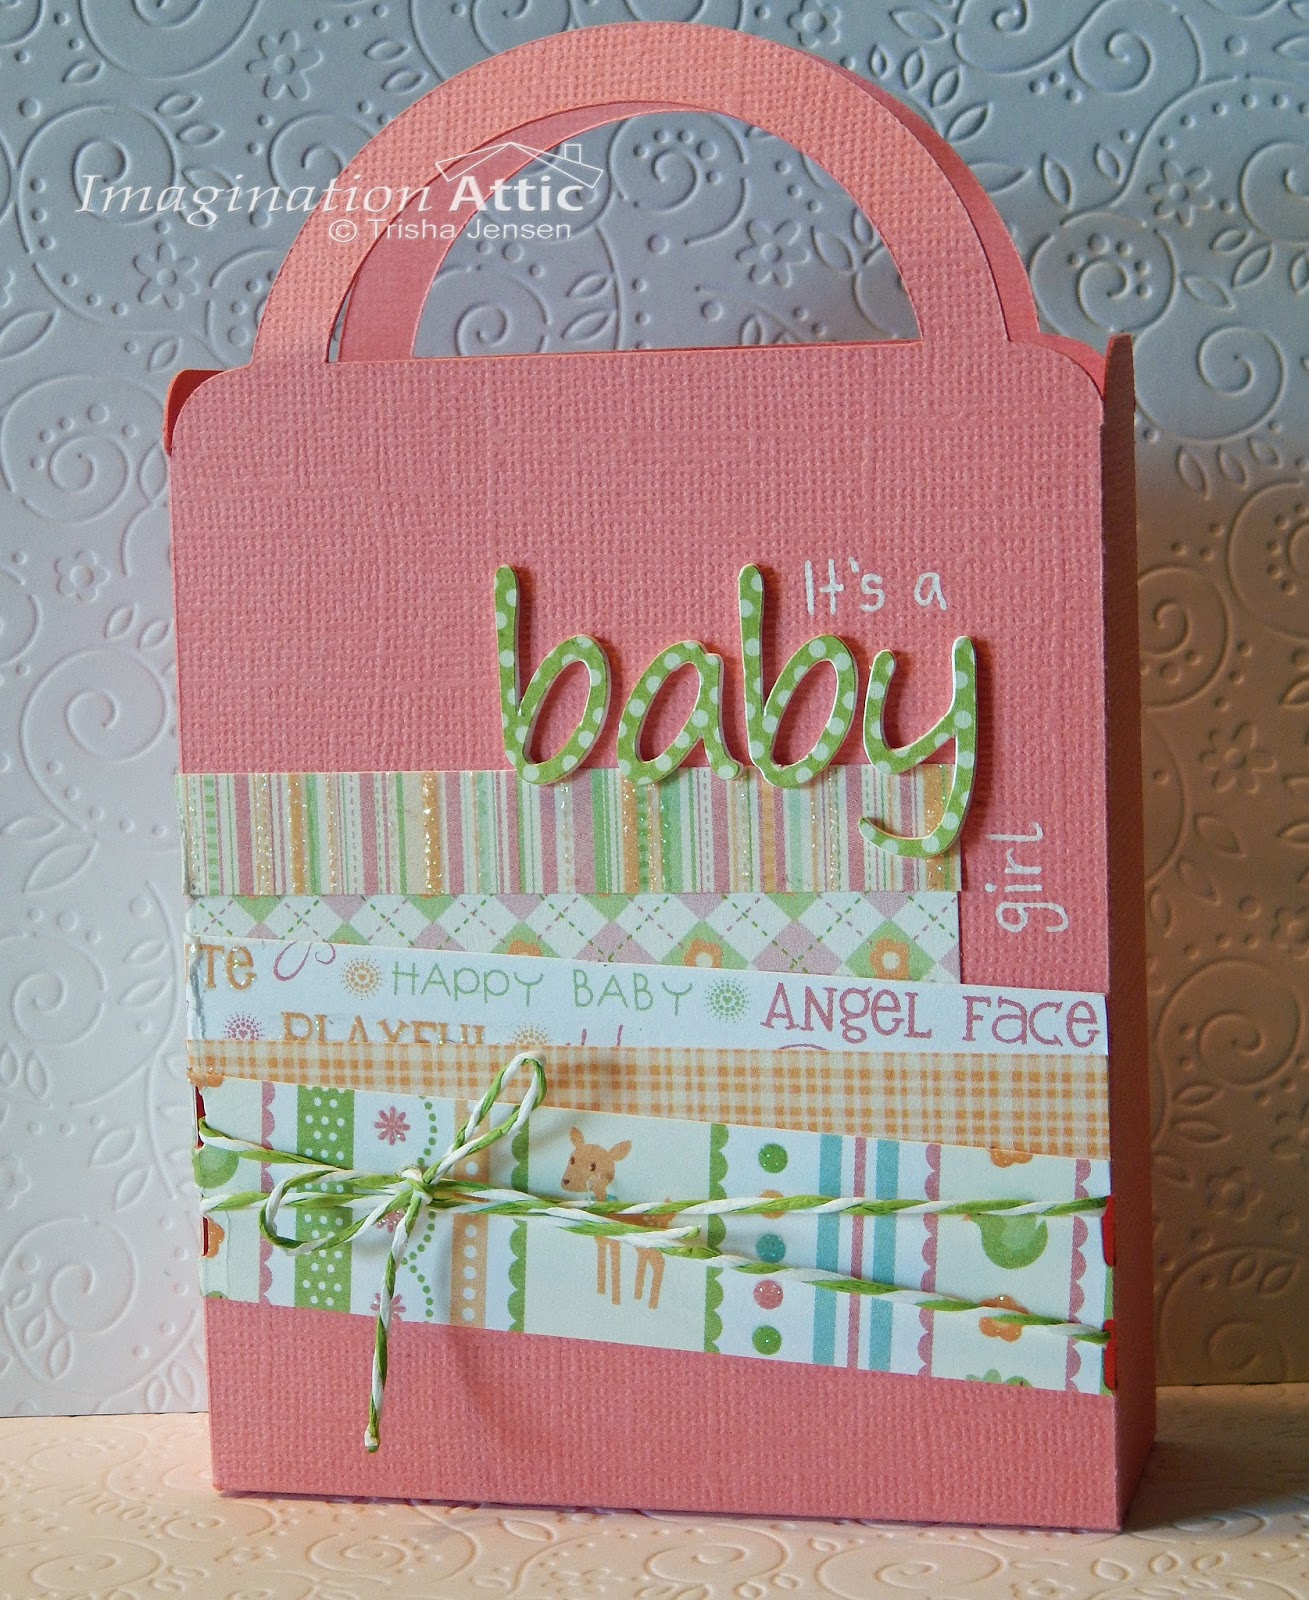
Baby Girl bag

I have a wonderful friend who supports me so much in my crafting and keeps me busy with some orders. One of her recent orders was a bag for a baby girl. I went to work and love how this bag turned out! 


 I have to admit I struggled a little bit on the decorating of the bag, nothing was really coming to me, so I reluctantly turned to Pinterest. I try not to use it too often, but it helped me out this time around. I found this card and followed the design just changing out the colors and other things. 

                                                        Handmade with Saar and Pien: Washi tape


I used my Cricut Explore Air to cut the bag and the word "baby". With the baby word I cut it out of white cardstock four times and then the patterned paper once, I glued them all together to layer them up and give some dimension. 
The patterned paper came from the DCWV Nana's Nursery Baby girl paper pad. I love the colors in this pad and chose some fun prints out of it to layer together in a staggered and angled position on the bag. 
The bakers twine is from Tim Holtz Idea-ology
I used a white gel pen to write in the other words to finish the sentiment. 
I used my ATG for some of the adhesive along with Tombow Mono Multi Glue

Thanks for visiting my blog today, and happy crafting!


Saturday, January 14, 2017

Bookmarks!

Good day to you all, I know it's been a whole year since I posted and I didn't even realize how long it had been. I haven't stopped creating though, I had a busy year with my crafting. I made a lot of product for a couple of booths that I did and then I had orders to fill from some customers.

Today I am sharing with you an order I did for 3 school classes for Christmas. These orders took a long time since overall I made 78 of them. One class had 22 students, another 27 and the last one 29. 
Unfortunately I only got some pics of one order. I ended up delivering the other two orders before I took pics, so on the last order I hurried and took some pics so that I could show you what I did, just envision 78 of them instead of only 29.
Even though it took a while these were really fun to create.  The teachers loved them and I hope the kids did too.  I know when I was making them my son really wanted a shark one, and he was so excited to go and read a book so that he could put his shark on the pages. 


I wish the pics could be better but I was in a hurry, I would have put a solid color backdrop behind them if I would have had the time.  I tried to take some pics at different angles so that you could see how they open up to fit on the corner of the page.  The gorilla, shark, snake and lion are some of my favorite ones because when you put them in your book it looks like they are eating it. 

All of the images came from the Cricut. I used my Cricut Explore Air and the Animal Bookmark Corners & Page Pals cartridges.  I adhered them all with the Tombow Mono Multi liquid glue.  I can't tell you what paper I used because it mostly came from my scraps.

Thanks for visiting my blog today and happy crafting!
Thank you for stopping by, taking a peek, and leaving a comment or two!