Showing posts with label Simon Says Stamp. Show all posts

Wednesday, July 8, 2020

Hugs, Kisses and Get Well Wishes!

Good morning! 
When I came across this image from an old retired Stampin Up set I had to use it, to make some fun Get Well soon cards for my card swap group.  
 Because I was making 8 cards total, I ended up using two different patterned papers for the background. 


I pulled out my Lawn Fawn Jet Black ink and stamped a bunch of images, and colored them in using my Prismacolor pencils. 
I used the Lawn Fawn outside-in stitched square dies to cut them out and also used a fun stitched scalloped rectangle die from My Favorite Things to cut out the white panel.
I shaded around the edges of the paper using a Picket Fence Blending brush and Simon Says Stamp Cobblestone ink. 
 For the finishing touch, I tied some twine around the panel with a bow. 


I kept them pretty clean and simple, don't you think they 
turned out super cute! 
Thanks for visiting me today, I hope you have a wonderfully crafty day! 

Thursday, November 21, 2019

You're Fintastic! Mermaid card for my daughter

My daughter, who is a freshman, recently had the opportunity to participate in her first overnight trip for the High School Swim Team! I was so excited and nervous for her because I had never missed a swim meet up until then. I wasn't able to travel to Moab, Ut for this particular swim meet and I wanted my daughter to know how much I was thinking about her and wanted to give her lots of love and encouragement, so I put together a little bag full of her favorite swim meet snacks and this super cute card.


I have always called my daughter My Little Mermaid and felt that it was fitting to make her a mermaid card. 
Not too long ago I started trying to create scenes on my cards and now I have fallen in love with that style. I had soooo much fun creating this underwater scene of encouragement! 

I used Neenah 80lb solar white cardstock and blended together Distress Oxide Inks of Cracked Pistachio, Broken China and Mermaid Lagoon with my Picket Fence Lifechanging Blending brushes. I splattered some water on the ink and blotted it off to give it a cool water effect.


I used my MISTI with some Versafine Onyx Black ink to stamp the mermaid and all of the sea life and other sea creatures. I mainly used the Beautiful Mermaids stamp set from Simon Says Stamp but some of the fish and also the sentiment are from Lawn Fawn's Fintastic Friends stamp set. 
I colored in all of my images using Prismacolor pencils. I used the coordinating dies from the mermaid set and my Cuttlebug to cut out those images and had to fussy cut the Lawn Fawn images because I don't have the dies for those. 


I adhered the images onto the water background using Tombow Mono Multi Glue and used Scotch foam tape to pop up the Mermaid. 
Some clear Wink of Stella was used on the Mermaid tail, seashells, and headband, then I added some Pretty Pink Posh sequins for a little more sparkle and I think they also look like bubbles! 

Thank you for visiting with me today, happy crafting!  

Monday, October 14, 2019

Happy Halloween Spider Pillow Box

It's my favorite time of the year! I love Fall & Halloween!
Making fun Halloween projects for friends and family is one of my favorite things to do during the season. Pillow Boxes are so fun to decorate and work great for giving small little gifts or treats. 


The Lawn Fawn Pillow Box die is such a great investment, you can use it any time of the year for just about anything! I used this die to cut my Pillow Box out of some grey cardstock and then started into the decorating! 


Using my MISTI tool I stamped the Simon Says Stamp Spiderweb background cling stamp with some light grey ink, then used some Versamark ink to stamp the "Happy Halloween" from Close to my Heart (no longer available) in the center of the box. I used some black embossing powder with my heat gun to melt the powder and give a cool raised and shiny effect. I used some Simon Says Stamp Deep Purple and Cobblestone inks to shade around the edges of the box to enhance the lines and make my Happy Halloween Sentiment stand out more. 


Thank you for visiting me today, I hope I inspired you to make some fun treat boxes for your friends and family! Have a wonderful day and Happy Crafting!!

Wednesday, September 18, 2019

Rainbow Candles Clean and Simple Birthday Card

Hello! I hope you are all having a wonderful day today! I am sharing a clean and simple Birthday card with you today, that I think would be great to give to just about anyone. I ended up giving this card to my Dad earlier this summer for his 70th Birthday! I couldn't resist using this stamp set for his card just to add this sentiment to it! I love the sentiments in this stamp set they all make me laugh!


Supplies used: 
The stamp set is "Birthday Borders" from Simon Says Stamp with coordinating dies, stamped in Versamark Onyx Black ink
I colored in the candles with Promarkers 
I die-cut 2 white panels from 80# Neenah Solar White cardstock with Lawn Fawn Outside In Stitched Rectangle dies one of them is inside the card to make it easier to write the message to the recipient
Mounting foam was used to adhere the candles and I used my ATG gun to adhere the panel onto a Bazzill Licorice Twist card base.  


Thank you for visiting with me today! 
Have a great day and happy crafting! 


Monday, March 18, 2019

A bright and cheerful encouragement card

How is everyone on this beautiful Monday? We are finally having some very nice weather here in southern Utah, it's almost Spring and I can't wait!

For today, I am sharing a card that I think we should be making more of and sending more out to those who inspire us and make us feel like we can conquer anything. We all people in our lives who lift us up and help us keep going. We could give them a simple thank you card, but I love the sentiment from the stamp set I used and the font is just beautiful. It's just a fun and different way of saying thank you, and they need encouragement too!


I pulled out my Beautiful Day Stamp set from Simon Says Stamp for this card. I stamped it using some Jet Black ink from Lawn Fawn onto some Neenah Cardstock. I made some masks with some post it notes and used them in the stamping and for masking my stamps to blend some Broken China and Peacock Feathers distress inks for the background. I flicked some water with Perfect Pearls over that to give it some texture and shine. 


I loved using my Prismacolored pencils to blend and color in the butterflies. Some Wink of Stella glitter brush pen was used on top of the butterflies and I adhered some clear sequins from Pretty Pink Posh to give it even more shine and sparkle. 


I hope you have been inspired to go and create or purchase an encouragement card for someone in your life who has been there for you. 

Thank you for visiting today, happy crafting!!

Wednesday, March 6, 2019

Watercolored "Thinking of you"

I hope everyone is having a great day so far, where I am at it is raining buckets right now, so it's perfect for getting out the tools and supplies and being creative! 

Today I am sharing with you a clean and simple card that I gave to a dear friend of mine who lost a really good friend of hers recently. It's not the kind of card we like to make and give out but it's nice to receive them when you are going through hard times yourself. 


I stamped the flower images (from Close to my Heart) onto some Strathmore cold press watercolor paper with Versamark ink and heat embossed them with white embossing powder. I stamped the sentiment from Simon Says Stamp with Jet black ink from Lawn Fawn. I used a #2 round Silver Black Velvet brush and some Crayola watercolors to paint the flowers and used some broken china distress oxide ink for the blue halo around them. To finish it off with just a tiny bit of bling I adhered some Pretty Pink Posh sequins with some Multi Medium Matte from Ranger. I adhered the panel onto a card base of Neenah Classic Crest Solar White #80lb cardstock with my Scotch ATG.  


Thank you for visiting me today, I hope I gave you some inspiration to give to someone you know who is going through a hard time right now too!
Happy Crafting!

Monday, February 18, 2019

I'm over the MOON for you!

Hello, today I am sharing with you what I made for my son's 3rd grade class for Valentines. I know Valentines is over, but it's still February!!  I had so much fun making these cute tags and putting together these bags of goodies. 

I was so happy when my son said he wanted a space theme this year, I got to use the Space Explorer stamp set from My Favorite Things for the first time since I got it!


These little astronauts turned out so adorable. I colored them just the way he wanted me to. When I asked him what color he wanted his space suit to be he said Red, with blue accents. I used some crayola and other no name brand pencils for the coloring. I don't use my really good Prismacolor pencils for the little kids, they just throw things like this in the garbage. Most people wouldn't have shaded and done as much detail as I did, but I figured it was great practice! I want to improve in my coloring so I went all in on 25 of these little astronauts!  


I used the Falling Stars Stencil from Simon Says Stamp with a white pencil to add some light stars in the background for a simple galaxy. I added a moon on the bottom of the circle tag with some scrap gray paper that I had in my stash, using a gray pencil I lightly added some moon craters to give it more detail and hopefully make it look more like the moon. I stamped my sentiment on it with Lawn Fawn Jet Black Ink


I used the coordinating dies of the stamp set to cut out my astronauts and adhered them with Tombow Mono Multi glue, I punched a small hole and tied it to the bag of goodies (milky way candy bars, 2 glow sticks, and a pencil with  a fun star eraser topper) with some red ribbon. 

I love how they turned out, and hope I get to play with this stamp set again, it has the cutest images in it! 


Thanks for visiting, have a great day and happy crafting!!


Tuesday, January 29, 2019

Love gives us a Fairytale!

Good evening to you all, I hope you had a wonderful day today. Tonight I want to share with you a card that I think turned out pretty cute!
Sorry for the bad lighting, it was a gloomy day and not the best for photographing the card, but I had to get this post up so that I can participate in the Simon Says Stamp Wednesday Challenge that ends tomorrow morning! The theme is Have a Heart and they are showcasing My Favorite Things products. I was so excited because I actually have a couple of stamp sets from MFT!!


With this card, I practiced my water coloring and tried my hand at creating a scene with the most adorable images from My Favorite Things. These stamp sets are so much fun, I just got them a little bit ago and couldn't wait to play with them. I look forward to many more projects with these super cute images. 


I had so much fun making this card, it took me quite a while since I am new at building scenes and don't have that much experience with watercolor, but it is one of my favorite mediums to use, it's so relaxing.


Supplies: 
Canson XL cold press watercolor paper
I actually just used some simple Crayola Watercolor Paints
(I am saving up to get me some good paints like Daniel Smith or Dr. Ph Martin's.) 
Silver Black Velvet brushes in size 2 and 6
Simon Says Stamp Love & Quotes stamp set
I used my Misti from My Sweet Petunia for all the stamping
Versafine Onyx black ink
Clear embossing powder (for the sentiment)
I used the Outside in Stitched rectangle die from Lawn Fawn to cut out my panel
Be Creative Tape was used to adhere the panel to the card base
The card base is made from Neenah 80 lb classic crest solar white cardstock
Sequins from Pretty Pink Posh in 4mm clear, 6 mm clear, 4 mm pink blush, 6 mm pink blush, 4 mm pink peonies, 6 mm orchid
I adhered the sequins using a Marvy Jewel Picker and Ranger Multi Medium Matte 
I used a Clear Wink of Stella brush pen to add a little shimmer to her dress, and the castle; I used a silver Wink of Stella pen for the Knight's sword. 

I created links to some of the products that are still available to the company websites. Most of the products I used can be found on Amazon, at Simon Says Stamp, Ellen Hutson, and many more online stores

Thank you for stopping by, I hope I sparked a little creativity in you! Happy Crafting!!


Thursday, November 8, 2018

Wishing you a Wonderful day!

Good morning friends! I posted this card on my Facebook page yesterday and didn't get a chance to put it up here until this morning. 


I had fun making this card, I got the idea out of an old Stampin Up catalog. I liked the colors used and just the overall layout. I changed my card from theirs by using different stamps, a different embossing folder, different ribbon, and I didn't pop up my panel-I just popped up the flower. They used a button for the middle of the flower and I used a brad. 


I stamped my images using Lawn Fawn Jet black ink, Memento Tangelo ink, Simon Says Stamp Audrey Blue ink and Stampin Up Green Galore ink. I then used Prismacolor pencils to add shading and depth to the flowers. The Swiss dots embossing folder helped to add that little bit of pattern without distracting from the focal point of the flowers. The Nested Circles dies from Simon Says Stamp and the Sentiment Banner dies from Lawn Fawn were helpful in creating this card also. Add some simple yellow ribbon and white twine to finish it off and there you have it! 

Thanks for visiting, have a wonderful and crafty day!!

(FYI, the stamps used were from the CTMH "Delight in Everything" stamp set, and the sentiment was from the "Bring on the cake" set from Stampin Up. I believe both sets are retired)


Monday, November 5, 2018

Lots of Smiles for the SSS Monday Challenge

Hey guys! Today I have a card that I hope will bring a smile to your face. 
I loved making this card, and using all the fun bright rainbow colors for my background. I am submitting this card over on the Simon Says Stamp Monday Challenge Blog where we were challenged to make our own background! Here is what I came up with: 


I used an old retired stamp set from Stampin' Up for my smiley faces. It's amazing that even though things get discontinued and old they are still cute and fun to use in making our projects! I stamped the solid shape in various colors of Memento ink. The smile stamp was stamped on top of the solid shapes using Lawn Fawn jet black ink. 


I then started using my dies. I used Pink and Main's stitched round rectangles to cut out my background and then I cut out of black cardstock Lawn Fawn's Cole's uppercase ABC's. I cut out 3 of each letter and stacked them up for dimension. Once they were glued down I sparkled them up with a Wink of Stella glitter brush pen and then put a coat of Glossy Accents on top of that for a fun sparkly and shiny finish! 

And that is my card for today, thank you for visiting, and have a super fun and crafty day!

Friday, October 12, 2018

World Card Making Day 2018!!

Hello my crafty and creative friends!

I know it has been forever since I have posted on my blog, I tend to post on my Facebook page more often. It's tough trying to balance home, family, work and blogging with the time we have each day, but I am trying to figure it all out!

Last Saturday was World Card Making Day and I missed it!! I found out about it a couple of days ago when I was checking out the Simon Says Stamp Blog and noticed a post about it where we get to participate in all the fun. Well, I quickly pulled together this card yesterday, got it photographed this morning and am now getting it up.

For my card I pulled out the new stamp sets I ordered from Stamptember and had my daughter pick out which stamp set and the colors I used. She picked out the SSS/Clearly Besotted exclusive Stamptember collaboration set called Magnificent Magnolia, and she wanted the flowers to be purple and yellow.  I think it turned out quite pretty!


For the background I ink smooshed some Broken China and Peacock Feathers Distress Inks on to my watercolor panel, then I splattered those same colors along with some perfect pearls and a little bit of black acrylic paint. 


On a separate piece of watercolor paper I heat embossed the flowers with Black embossing powder and used my Derwent Inktense pencils for my painting medium. I used the coordinating dies to cut out my flowers and adhered them onto my dry ink smooshed background panel. 
I also heat embossed the sentiment with black embossing powder. I added a few clear sequins from Pretty Pink Posh and used my clear Wink of Stella brush pen to give it some extra sparkle! 


Thank you for visiting my blog, I hoped you got inspired for your crafty projects!

Supplies used: 
Strathmore & Canon watercolor paper
Broken China and Peacock Feathers Distress inks
Perfect Pearls and black acrylic paint
SSS/Clearly Besotted Magnificent Magnolia stamp and die set
Versamark Ink 
Black embossing powder
Derwent Inktense watercolor pencils
#2 round brush from the Silver Brush Company
Pretty Pink Posh Clear Sequins
Multi Medium Matte adhesive
Tombo Mono Multi Glue
Scotch Foam Tape
Clear Wink of Stella Brush Pen 

See you soon, happy crafting!!


Thursday, March 23, 2017

You Mean the World to Me

Hello and good day everyone, today I am finally getting around to sharing my cards that I made for my card swap group for the month of February. I know I am a month late, but better late than never right?

Our theme was a choice of wedding, anniversary, or love; and also based on a sketch by Julee Tilman over at Mojo Monday Card Sketch Challenge Blog I went with a simple love theme that I think is pretty universal.  I love this card, it turned out just like I envisioned from the sketch. 


SUPPLIES:
Stamps: Concord & 9th "Map Love" and CTMH "Charming Cascades"
Inks: SU Real Red, SSS Audrey Blue and Versamark
Embossing Powder in Clear, Black and Red
The MISTI was used for all the stamping
I used my Cricut to cut out the circle and scalloped circle
We R Memory Keepers Crop-a-dile Corner Chomper
PPP Sparkling Clear Sequins
Adhesives: ATG adhesive, Scotch Mounting foam, Ranger Multi Medium Matte

Links provided for easier shopping if you are interested in the products I used. Some links are direct to the company and others are to my favorite online craft supply store.-Simon Says Stamp!  Another source for some of these products is amazon.

Thank you for visiting today! Happy Crafting!

Friday, January 27, 2017

basketball treat bags & SSS wednesday challenge

Hello, I hope everyone is having a wonderful day! 
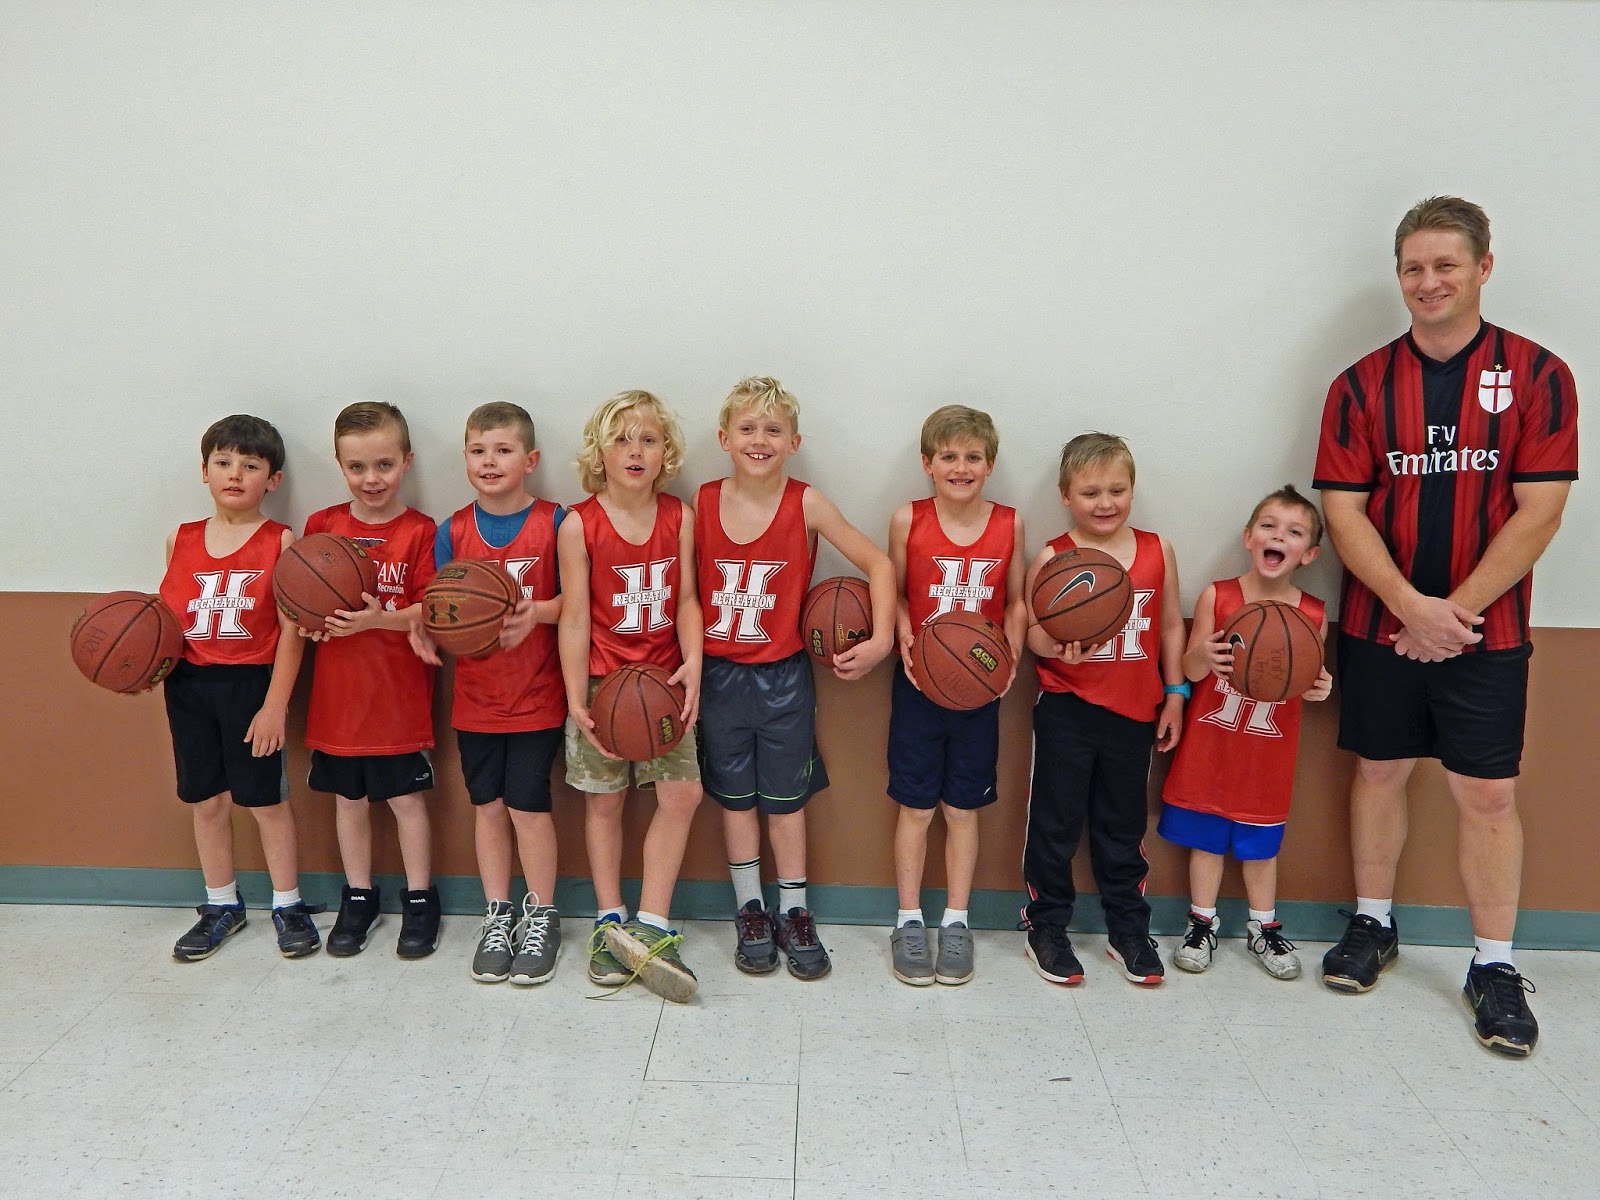
I am sharing with you a fun project for my son's basketball team. We coach everything that he is involved in: basketball, soccer, baseball; you could say we are pretty busy.  I always like to give them a fun bag of goodies at their last game as a way of telling them thank you for being on our team and letting them know they did a good job!  We had a lot of fun with this group of boys, they are in 1st and 2nd grade and full of energy!!

I am also entering this project in the SSS Wednesday Challenge of Anything Goes!


Supplies used:
white and orange paper
Memento rich cocoa and tangelo inks
SSS Sports Planner stamp set with coordinating dies
SSS Stitched Circles dies
Zig writer/marker: chocolate  

Thank you for visiting my blog!    Have a great and crafty day!

Wednesday, January 25, 2017

Leslee's Birthday Bag

Good Morning everyone, today I wanted to share with you a cute little bag that I filled with just a few fun goodies like some crafty embellishments, gum, body spray, etc.. for a friend of mine. We recently went to lunch together to celebrate both of our Birthdays, and I surprised her with this little bag! 


The bag came from a pad by Colorbok called Create A Box. It has a bunch of pre-cut and scored bags and boxes.  I used some Ranger Peacock Feathers Distress Ink to blend in and soften the edges of the box and then I embellished the bag with a stamp and die set from Sizzix & Lori Whitlock. I used my MISTI to stamp the images in Versamark, applied white embossing powder from Stampendous, then heat set with my heat gun from Darice. I used some watercolors to paint my images. I cut out the images with the coordinating dies using my Cuttlebug. To finish it off I applied some Crystal Clear & Marshmallow Sequins from PPP using Ranger Multi Medium Matte and then tied a bow at the top to give it that extra touch.

I tried to give links to most of my supplies, a lot of them are linked to the manufacturer but you can also buy most of them from Simon Says Stamp or Amazon.

Thank you for visiting today, I hope you have a fun and crafty day!


Monday, January 23, 2017

Be Mine Valentine Box-SSS Wednesday Challenge

Good day all, today I am sharing a fun project that I made for the Simon Says Stamp Wednesday Challenge which is to make anything but a card. They are showcasing products from We R Memory Keepers and I just happen to have a few things of theirs. 
I like how easy they are to make and they are the perfect size to fit a yummy treat with maybe some lip gloss or earrings, etc..  I will be making several of these for some good friends for Valentine's.


I made these little boxes using the We R Memory Keepers Envelope Punch Board from an old Laura Bassen video tutorial. I also used a We R Memory Keepers Embossing folder on the white strip to make some thick stripes. I stamped the hearts and sentiment using Memento Tuxedo Black Ink and my MISTI. I used my Black Wink of Stella  brush marker on the black part of my big heart to give it some sparkle. Speaking of sparkle I added some Crystal Clear Sequins and Silver Heart Confetti from PPP with my Ranger Multi Medium Matte. I adhered the big heart with some mounting foam tape for some dimension.  On the back I secured my flap with a little Velcro circle. 

I tried to provide links to most of my supplies, I mostly get them from Simon Says Stamp but there are some I get from amazon, or from the manufacturer.

Thanks for visiting my blog today, Happy Crafting!


Thank you for stopping by, taking a peek, and leaving a comment or two!