Monday, June 26, 2017

Baby Girl bag

I have a wonderful friend who supports me so much in my crafting and keeps me busy with some orders. One of her recent orders was a bag for a baby girl. I went to work and love how this bag turned out! 


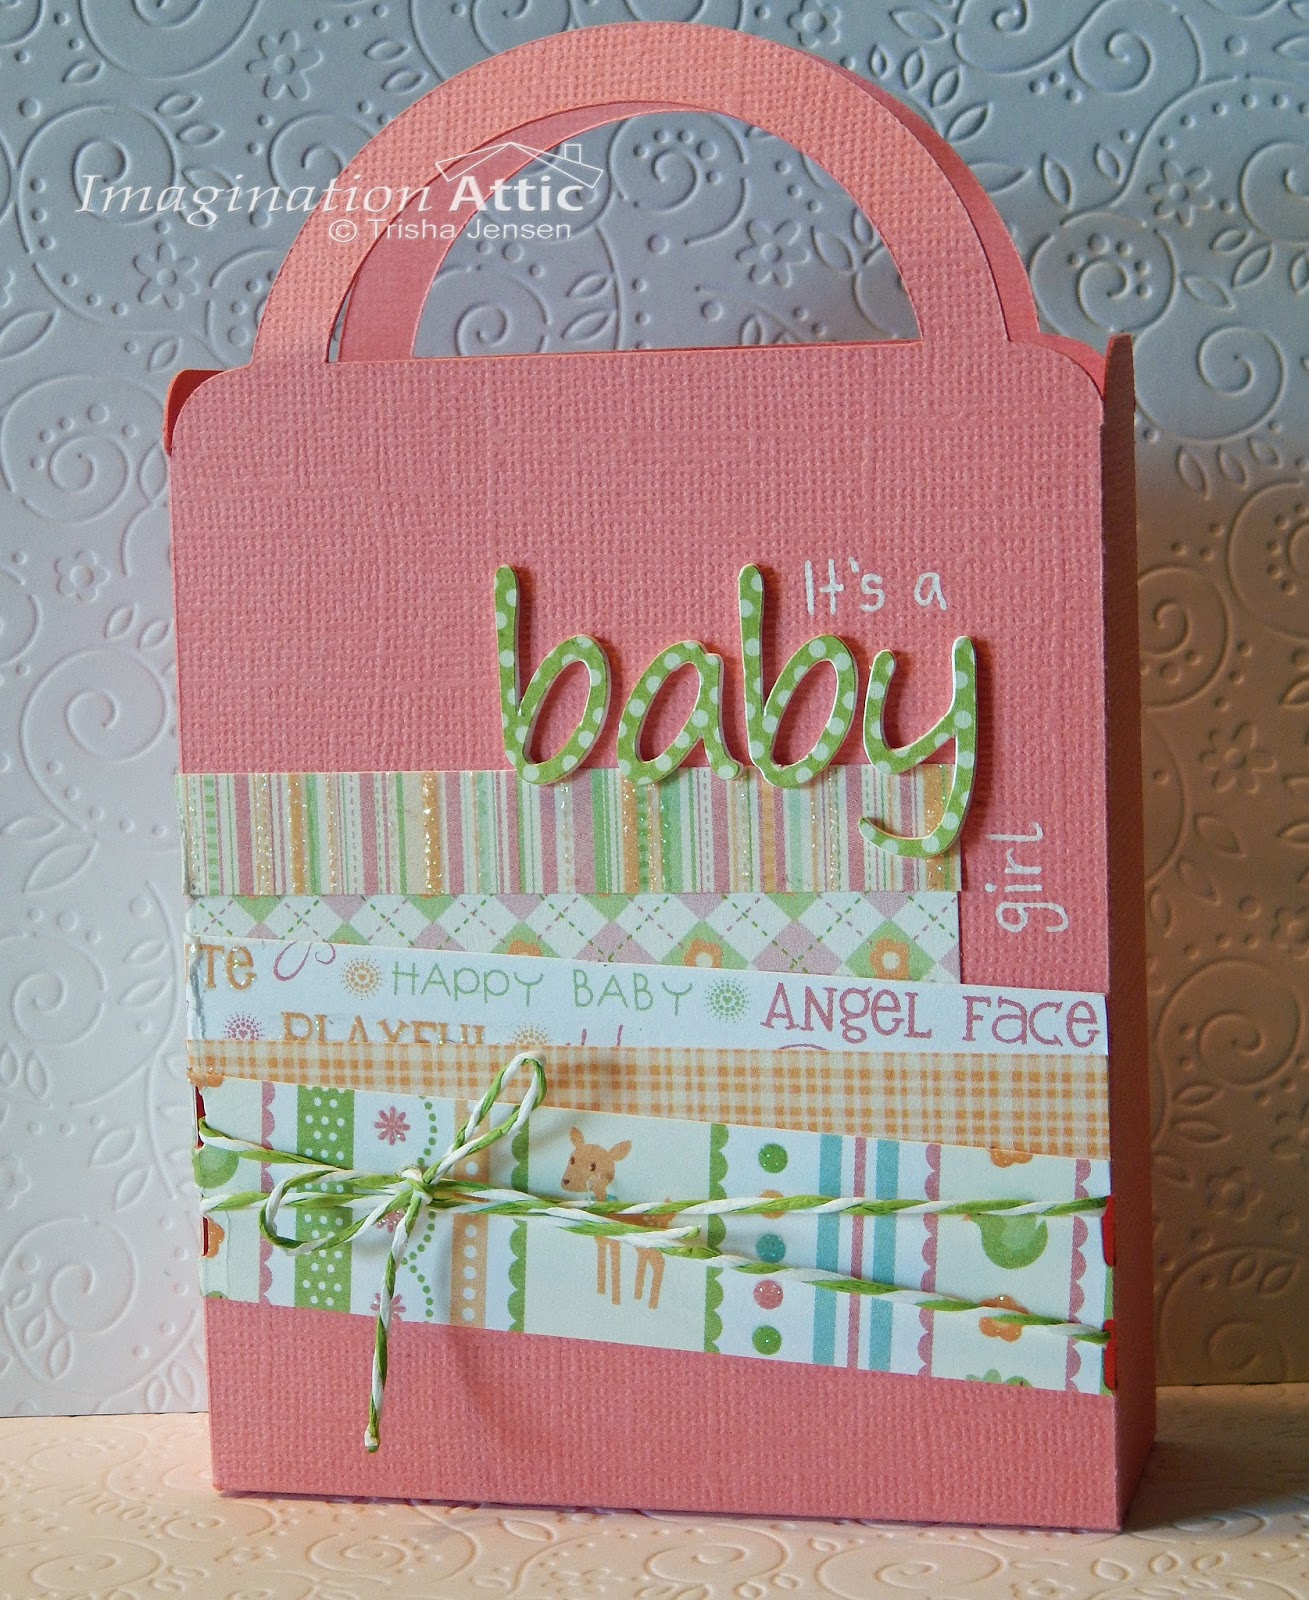
 I have to admit I struggled a little bit on the decorating of the bag, nothing was really coming to me, so I reluctantly turned to Pinterest. I try not to use it too often, but it helped me out this time around. I found this card and followed the design just changing out the colors and other things. 

                                                        Handmade with Saar and Pien: Washi tape


I used my Cricut Explore Air to cut the bag and the word "baby". With the baby word I cut it out of white cardstock four times and then the patterned paper once, I glued them all together to layer them up and give some dimension. 
The patterned paper came from the DCWV Nana's Nursery Baby girl paper pad. I love the colors in this pad and chose some fun prints out of it to layer together in a staggered and angled position on the bag. 
The bakers twine is from Tim Holtz Idea-ology
I used a white gel pen to write in the other words to finish the sentiment. 
I used my ATG for some of the adhesive along with Tombow Mono Multi Glue

Thanks for visiting my blog today, and happy crafting!


Thursday, March 23, 2017

You Mean the World to Me

Hello and good day everyone, today I am finally getting around to sharing my cards that I made for my card swap group for the month of February. I know I am a month late, but better late than never right?

Our theme was a choice of wedding, anniversary, or love; and also based on a sketch by Julee Tilman over at Mojo Monday Card Sketch Challenge Blog I went with a simple love theme that I think is pretty universal.  I love this card, it turned out just like I envisioned from the sketch. 


SUPPLIES:
Stamps: Concord & 9th "Map Love" and CTMH "Charming Cascades"
Inks: SU Real Red, SSS Audrey Blue and Versamark
Embossing Powder in Clear, Black and Red
The MISTI was used for all the stamping
I used my Cricut to cut out the circle and scalloped circle
We R Memory Keepers Crop-a-dile Corner Chomper
PPP Sparkling Clear Sequins
Adhesives: ATG adhesive, Scotch Mounting foam, Ranger Multi Medium Matte

Links provided for easier shopping if you are interested in the products I used. Some links are direct to the company and others are to my favorite online craft supply store.-Simon Says Stamp!  Another source for some of these products is amazon.

Thank you for visiting today! Happy Crafting!

Sunday, February 26, 2017

Valentines treats 2017

I made some fun treat bags for my son's class and teacher at school for Valentines, and I finally have the time to share them with you. 
I like to have my kids help me design what they want their bags to look like, so my son picked out the colors and the stamps that I used for the toppers and he wrote his name on the back of all 23 of them. I filled the teacher's bag with some yummy treats and paired it with some lotion and a cute notebook.


Supplies:
grey & white cardstock
patterned paper
paper trimmer
Martha Stewart scoring board
Create a box from Colorbok
clear treat bags
MISTI
Stamps: Little Layers Plus(Stampin' Up), Happiest Moments (MPS), Love is(CTMH)
Inks: Antique Pewter(colorbox), Real Red(SU), Angel Pink & Tuxedo black(Memento), Picked Raspberry(distress ink), Versamark
White, black and silver embossing powder
embossing buddy from Stampin' Up
Adhesives: Elmer's glue, Ranger Multi Medium Matte, foam tape & Velcro dot
PPP sequins in sparkling clear, raspberry and pink blush
black ribbon


Saturday, February 25, 2017

You are "Extra" Special

Hello, in this post I am sharing with you the rest of the tags that I made for the teacher appreciation week that was earlier in the month. I have been so busy doing projects and a lot of travel, I am finally home and have a little bit of time to post about all my creations. 

I made these just like the other ones, with my Cricut! I love the pen feature on this so you don't have to do the writing yourself; it looks really good and it would have been a lot of writing for 56 tags!
We attached these to some packs of Extra gum. I kept it really simple just cutting them out in a circle, and I used some colored pencils for the coloring and matching it to the gum packaging.


Supplies:
Cricut & Cricut black marker
white cardstock
light & dark blue colored pencils
lime green & green colored pencils
lime green ink stampin' up
blue ink colorbox
tape
Extra gum

Thanks for visiting today!


Tuesday, February 7, 2017

Teacher Appreciation "Mint" tags

The PTO out at my daughter's Intermediate School are having Teacher Appreciation this week and they asked me if I could make some tags for the treats that are going with the gift they were giving the staff today. 

These came together pretty quickly with the help from my Cricut!  I designed the tags in design space and the Cricut did the rest.  I love that it will write for you, it came in handy for a big project like this. I made a total of 56 tags!


Supplies:
Cricut Explore
Cricut fine tip marker
white paper
green colored pencils and crayons
green ink (Colorbox)

Monday, February 6, 2017

Paper Quilt for Teacher Appreciation

Today starts Teacher Appreciation week at my daughter's Intermediate School.  I volunteered to decorate one of the teacher's doors and they assigned me the Home Ec (CTE) teacher's door. I had a lot of fun making this though I put it together really quickly and with minimal supplies, so it ended up being quite sloppy and not my best work. But it still turned out cute and the teacher loved it. 


Supplies:
Butcher paper from the school
crayons
a sharpie marker
tape and glue

Thanks for visiting me today, and happy crafting!


Friday, January 27, 2017

basketball treat bags & SSS wednesday challenge

Hello, I hope everyone is having a wonderful day! 
I am sharing with you a fun project for my son's basketball team. We coach everything that he is involved in: basketball, soccer, baseball; you could say we are pretty busy.  I always like to give them a fun bag of goodies at their last game as a way of telling them thank you for being on our team and letting them know they did a good job!  We had a lot of fun with this group of boys, they are in 1st and 2nd grade and full of energy!!

I am also entering this project in the SSS Wednesday Challenge of Anything Goes!


Supplies used:
white and orange paper
Memento rich cocoa and tangelo inks
SSS Sports Planner stamp set with coordinating dies
SSS Stitched Circles dies
Zig writer/marker: chocolate  

Thank you for visiting my blog!    Have a great and crafty day!

Wednesday, January 25, 2017

Leslee's Birthday Bag

Good Morning everyone, today I wanted to share with you a cute little bag that I filled with just a few fun goodies like some crafty embellishments, gum, body spray, etc.. for a friend of mine. We recently went to lunch together to celebrate both of our Birthdays, and I surprised her with this little bag! 


The bag came from a pad by Colorbok called Create A Box. It has a bunch of pre-cut and scored bags and boxes.  I used some Ranger Peacock Feathers Distress Ink to blend in and soften the edges of the box and then I embellished the bag with a stamp and die set from Sizzix & Lori Whitlock. I used my MISTI to stamp the images in Versamark, applied white embossing powder from Stampendous, then heat set with my heat gun from Darice. I used some watercolors to paint my images. I cut out the images with the coordinating dies using my Cuttlebug. To finish it off I applied some Crystal Clear & Marshmallow Sequins from PPP using Ranger Multi Medium Matte and then tied a bow at the top to give it that extra touch.

I tried to give links to most of my supplies, a lot of them are linked to the manufacturer but you can also buy most of them from Simon Says Stamp or Amazon.

Thank you for visiting today, I hope you have a fun and crafty day!


Monday, January 23, 2017

Be Mine Valentine Box-SSS Wednesday Challenge

Good day all, today I am sharing a fun project that I made for the Simon Says Stamp Wednesday Challenge which is to make anything but a card. They are showcasing products from We R Memory Keepers and I just happen to have a few things of theirs. 
I like how easy they are to make and they are the perfect size to fit a yummy treat with maybe some lip gloss or earrings, etc..  I will be making several of these for some good friends for Valentine's.


I made these little boxes using the We R Memory Keepers Envelope Punch Board from an old Laura Bassen video tutorial. I also used a We R Memory Keepers Embossing folder on the white strip to make some thick stripes. I stamped the hearts and sentiment using Memento Tuxedo Black Ink and my MISTI. I used my Black Wink of Stella  brush marker on the black part of my big heart to give it some sparkle. Speaking of sparkle I added some Crystal Clear Sequins and Silver Heart Confetti from PPP with my Ranger Multi Medium Matte. I adhered the big heart with some mounting foam tape for some dimension.  On the back I secured my flap with a little Velcro circle. 

I tried to provide links to most of my supplies, I mostly get them from Simon Says Stamp but there are some I get from amazon, or from the manufacturer.

Thanks for visiting my blog today, Happy Crafting!


Friday, January 20, 2017

Birthday Card Set

Hello everyone, today I am sharing a project I made for my Card swap group. This month's theme is Birthday.  We were supposed to make a card and tag for this. We also started to use sketches each month to change things up a bit.
I don't know about you guys but I like to coordinate things together. So I ended up making my tag to match my card and I went ahead and made a matching envelope also.  I love the colors and had a great time creating this set, I hope you like it too!


Supplies:
Stamp & die set from Sizzix-Lori Whitlock
Memento Tuxedo Black ink and marker
I used my MISTI for all of my stamping
 I stamped the sentiment for the card using Versamark and then heat embossed it using Stampendous Marcasite embossing powder.
My Cuttlebug was used for all the die cutting
SU 2 3/8 scallop punch and also the 1 1/4 scallop punch
I colored in the images with EK Success colored pencils
I used my ATG to adhere everything except I used the 3M Mounting Foam tape on the party hat and the small scallop circle on the tag.
I used the Zig two way glue pen to add some Crystal Art Glitter to the hat for an added bit of sparkle.

Thank you for visiting my blog today, I hope I helped inspire you in some way.
Happy Crafting!


Tuesday, January 17, 2017

School Christmas Tree

Hello all, I hope you are all having a good day!  I finally got my computer to load these pictures. I have been having a little technical difficulty with my camera and computer working together.

I am sharing with you today a big project that happened back at the beginning of December.  After Thanksgiving break my son's teacher asked for my help in Decorating a Christmas Tree.  The first grade was asked to come and decorate the tree at our local bank. The Principal put my son's teacher in charge of the project, and then she came to me knowing that I am crafty.
We all loved it and thought it turned out really cute!


I made all the ornaments using my Cricut. Cartridges used are Doodlecharms and Locker Talk. The school provided me with the paper. I ended up making about 24 of each of the buses, scissors, & glue. I made 120 apples and we put all of the kids pictures on the apples and had them right their name on the back. We used some other school supplies like the crayons and pencils to help fill it in.


The Teacher provided the bow and I just added the school initials in the center.

Thank you so much for visiting today! Happy Crafting!


Monday, January 16, 2017

M&M Christmas Treat Stacks

Good day everyone, today I am sharing with you some goodie treat bags I was asked to create from a super sweet customer. She wanted these simple and fun treats to give to some co-workers and young women from the community that helped her out during the holidays.  I made these super quick because she contacted me to make them about a week before Christmas.


I created these cuties using the Lunch Box Notes Dies from Simon Says Stamp, an old stamp set from CTMH-"Christmas Greetings", and the stocking stamp came from an older SU set called "Color Me Christmas". I stamped all the images using Memento Tuxedo Black ink using my MISTI tool. I used simple Crayola watercolor paints for the coloring. I added some stickles in "Stardust, Green and Christmas Red".  I filled 1x8 cello bags from Clear Bags with some holiday M&M's and then used some twine to put it all together.

I had a lot of fun putting these together and they make such a fun little, inexpensive treat to let someone know that you are thinking of them. I like how versatile these can be, you can make these for any holiday or celebration just change the candy and what's on the tag and your all set.

Thank you for visiting my blog, I hope I have inspired you to create something for someone in your life today! Happy Crafting!

Thank you for stopping by, taking a peek, and leaving a comment or two!